Introduction
Updating your home with a fresh, modern floor doesn’t always demand a professional. Installing vinyl flooring yourself can deliver high-end results without the high-end cost. Whether you’re revamping a kitchen, bathroom, or family room, this guide walks you through each stage—preparation, installation, and finishing. Let’s dive into the world of DIY vinyl flooring installation, where durability meets style and satisfaction meets savings.

Why Choose Vinyl Flooring?
Vinyl flooring is an increasingly popular choice for DIYers—and for good reasons:
- Water-resistant or waterproof: Ideal for kitchens, bathrooms, and basements Bob VilaTimes Union.
- Affordable: Costs typically range between $2 to $8 per square foot—considerably less than hardwood or tile Times UnionBob Vila.
- Durable & low-maintenance: Scratch-resistant coatings and easy cleaning mean your floor stays beautiful with minimal effort Bob VilaMajestic Flooring.
- DIY-friendly installation: Options like click-lock or peel-and-stick make it accessible for beginners The Home DepotBob Vila.
Luxury Vinyl Plank (LVP) and Luxury Vinyl Tile (LVT) emulate wood or stone textures, offering elegance without the upkeep Times Union.
Tools & Materials You’ll Need
Essential Tools:
- Utility knife, measuring tape, straightedge, chalk, pencil
- Rubber mallet, tapping block (for click-lock)
- Pry bar (to remove baseboards)
- Notched trowel and adhesive (for glue-down method)
- Level or straightedge, shop vacuum or broom
Materials Checklist:
- Vinyl flooring (click-lock, peel‑and‑stick, or glue‑down)
- Underlayment (if not built-in)
- Spacers for expansion gaps
- Baseboards or quarter-round trim
- Optional: leveling compound, patch, or floor cleaner
Step-by-Step Installation Guide
1. Acclimate the Flooring
Allow your vinyl to sit in the installation room for 24–48 hours to stabilize its dimensions—this prevents gaps or buckling later on Bob VilaFlooringFirst!The Rouse Homes.
2. Prepare the Subfloor
- Remove old flooring, vacuum thoroughly, and ensure the surface is clean, dry, and level The Rouse HomesAngi.
- Address any imperfections: fill cracks, sand bumps, and allow repairs to dry Bob VilaForbesSquarefoot Flooring.
- Avoid applying vinyl over asbestos-likely materials—remove such layers entirely The Home Depot.
3. Install Underlayment (If Needed)
If your planks don’t include built-in underlayment, roll out a moisture-resistant underlayment, cut to fit, butt edges and tape seams Bob VilaBUILDMYPLACE.
4. Plan Your Layout
- Measure room dimensions to determine how many full rows you’ll need and to ensure border cuts are no thinner than half the plank width The Home DepotForbesSquarefoot Flooring.
- Dry-lay and shuffle planks to distribute patterns naturally and avoid lining up repeats Bob VilaReddit.
- Snap chalk lines or decide plank orientation (usually parallel to longest wall) ForbesAngi.
5. Begin Installation
Depending on the installation method:
** Click-Lock/Floating:**
- Remove tongue on the wall-facing edge of your first plank if needed.
- Place plank with groove facing away from the wall, using spacers for a ¼‑inch expansion gap The Home DepotForbesAngi.
- Angle the next plank, click/tap together, and continue row by row The Home DepotForbesSquarefoot Flooring.
** Glue-Down / Peel-and-Stick:**
- For glue-down, find center lines and work outward; apply adhesive, let it haze, then lay planks The Home DepotAngi.
- For peel-and-stick (GripStrip), lay planks with overlapping adhesive and press with a roller or by hand The Home DepotAngi.
Always stagger seams at least 6 inches between rows for structural stability and visual appeal Squarefoot FlooringForbes.
6. Cutting & Fitting
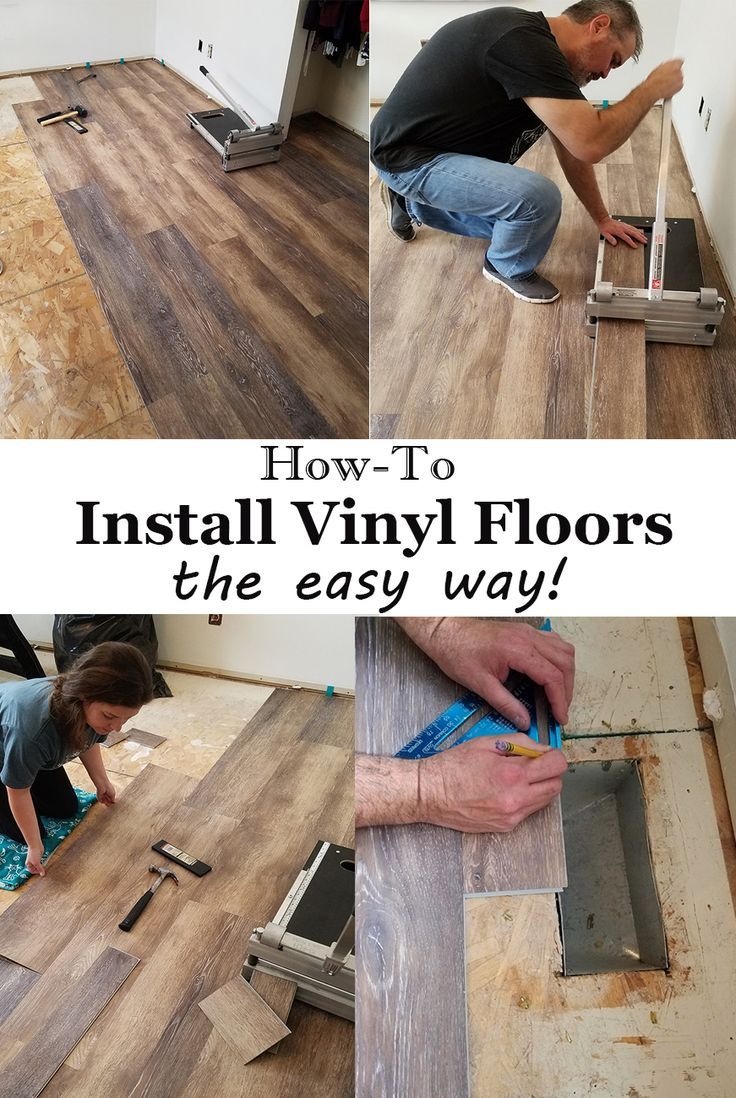
- Use a utility knife and straightedge to score and snap planks. For intricate cuts, trace with scrap paper and cut with a jigsaw or utility knife The Rouse HomesArchitectural DigestThe Home Depot.
- Maintain expansion gaps around all edges. Trim them out later with baseboards or quarter-rounds AngiSquarefoot FlooringThe Home Depot.
7. Finishing Touches
- Reinstall baseboards or add quarter-round molding to conceal expansion gaps Architectural DigestThe Home Depot.
- For glue-down, roll the floor with a heavy roller to ensure adhesion The Home Depot.
Post-Installation Care & Maintenance
- Remove any factory seal and consider applying high-traffic polish; use a neutral-pH cleaner to maintain shine The Home Depot.
- Sweep regularly and mop with mild solutions. Avoid harsh cleaners that can degrade the wear layer Majestic Flooring.
- Use protective pads on furniture, clean spills promptly, and refresh polish every six to nine months The Home Depot.
Conclusion
Installing vinyl flooring yourself is a smart, stylish, and cost-effective project that any dedicated DIYer can tackle. With proper planning, preparation, and attention to detail—from acclimation to trim finishing—you’ll enjoy the beauty and resilience of vinyl flooring day after day. Ready to roll up your sleeves and refresh your home? Let’s make your space shine with confidence and efficiency.