Introduction
Ready to unlock cleaner energy and shrink your utility bills? Installing solar panels on your roof is one of the most impactful upgrades you can make for your home—and for the planet. With favorable incentives and lower costs in 2025, going solar has never been more appealing. In this guide, you’ll learn how to install solar panels on a roof, demystifying everything from site planning and selection to mounting, wiring, and financing.
Why 2025 Is a Prime Year to Go Solar
Solar costs are at historic lows, ranging roughly from $2.50 to $3.50 per watt installed, translating to $15,000 to $35,000 before incentives for typical systems. After applying the 30% federal tax credit, net prices fall to $10,500–$24,500. The Investment Tax Credit (ITC) may expire after 2025, so this window offers maximum savings.SolarTechEnergySageHaina Solar
Lifetime savings are impressive—most homeowners recoup their investment in 6–10 years, earning between $31,000 and $120,000 over 25 years. Solar can also raise home resale value by $15,000 or more.SolarTechEnergySageMianro SolarSustainable Design
Installation Process: Step by Step
1. Evaluate Your Roof and Site Suitability
Start by assessing:
- Roof orientation and unshaded exposure
- Structural condition—you may need professional certification for load-bearing capacity
- The space required (a typical system is 20–30 sq ft per kW)
Amstill Roofing CompanySolarTech
2. Design Your Solar System
- Determine your energy needs (kWh) by reviewing utility bills
- Decide on system size (e.g., 6 kW generates ~7,000–9,000 kWh annually)
- Consult local net metering policies to maximize credits when exporting excess power
Mianro SolarSolarTechSustainable Design
3. Secure Financing and Incentives
- Federal ITC: 30% tax credit through 2025
- State/local incentives: rebates, SRECs, and performance-based programs
- Financing options:
- Cash purchase: highest ROI, full ITC benefit
- Solar loans: spread cost over time—compare APRs carefully
- Leases or PPAs: lower or no upfront cost but limited savings/credits
Mianro SolarSustainable DesignKiplinger
4. Choose Your Equipment
- Panels: Monocrystalline (higher efficiency/cost) vs. polycrystalline
- Inverters: String vs. microinverters—microinverters offer better shade handling
- Mounting: Rail-mounted or rail-less systems depending on roofing material
Mianro SolarAmstill Roofing Company
5. Hire a Professional or DIY?
- DIY installation may cut labor costs (~20–30% of total), but requires comfort with roofing, wiring, and permits.
- Many jurisdictions mandate licensed installation for rebates/credits.
- If unsure, hire an experienced contractor who handles permits, inspections, and rebates.
TIME (caution about faulty leased systems and lack of support)
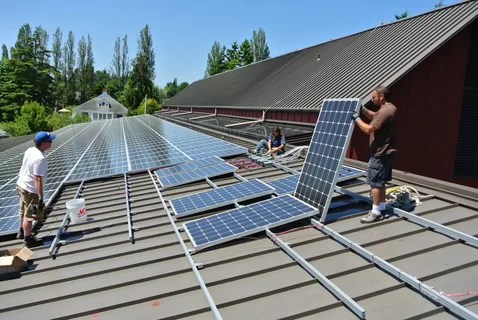
6. Mounting & Electrical Connections
- Install flashing to prevent roof leaks
- Secure racks directly into roof rafters
- Affix panels and connect wiring to the inverter, often using a load-bearing combiner box
- Tie in with home’s main panel and net metering system
- Schedule final inspection to activate system and claim incentives
Financing, Costs, and Savings
Here’s a breakdown:
- Cost per watt: $2.50–$3.50
- Typical system cost: $15,000–$35,000 before incentives (e.g., 6 kW system yields $10,500–$24,500 net cost)
- Savings: Max 6–10 year payback, $31K–$120K lifetime savings
- Incentives: ITC at 30%, plus local rebates and net metering
SolarTechEnergySageMarketWatch
Conclusion
Installing solar panels on your roof in 2025 is a transformative step toward energy independence, cost savings, and a greener lifestyle. With low equipment prices, generous tax incentives, and robust returns, now is among the best years to invest. Whether you’re going DIY or hiring professionals, careful planning, proper design, and timely execution—especially before the 2025 ITC changes—will ensure a successful installation. Ready to harness the sun’s power for your home? Let’s get started today.