Introduction
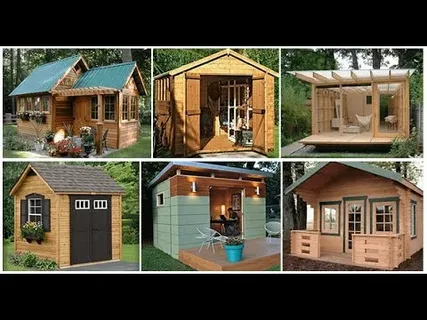
Building a garden shed from scratch is a rewarding way to create extra storage or a versatile backyard workspace. Beyond the functional wins, crafting your shed gives you full control over its style, materials, and layout. Whether you’re storing tools, creating a workshop, or starting a “she shed” retreat, this guide walks you through every stage—from foundation to finishing touches—with clear steps, practical tips, and expert advice.
Planning and Site Preparation
Choose the Best Location
Start by selecting a level, well-drained spot easy to access with wheelbarrows or equipment. Avoid low-lying areas or those close to dense tree cover. Ideally, the ground should be within 6 inches of level to simplify foundation work. The Home Depot
Check Regulations
In many cases, small sheds are “permitted development” and don’t require planning permission. However, if your shed exceeds 2.5 meters in height or 15 m² in area, or includes plumbing or electrical work, you may need approval. aosom.co.uk
Clear and Mark the Site
Clear vegetation and debris, then level the ground. Use stakes and string to outline the perimeter, ensuring square corners. Accuracy here avoids later structural issues. Main WebsiteGreatGardenPlans
Building a Solid Foundation
A proper foundation ensures stability, prevents rot, and supports the shed’s weight.
Foundation Options
Choose from among:
- Concrete slab — Highly durable and ideal for large sheds. Green Harbor Toolsaosom.co.uk
- Concrete piers — Good for smaller structures with drainage considerations. Green Harbor Tools
- Wooden skids/runners or blocks — Budget-friendly and suitable for temporary or light-use sheds. Green Harbor Tools
Ground Preparation
Excavate and add a compacted base such as hardcore or scaled rubble. Then either pour your concrete or install base blocks/skids on gravel. Main WebsiteSummerhouse24 Ireland
Floor and Framing
Assemble the Floor Frame
Construct a stable base using treated 2×8 or similar lumber. Space joists evenly—typically around 16 inches on-center—and secure them squarely with screws or joist hangers. The Home DepotGreatGardenPlans
Install the Floor Sheeting
Lay plywood or tongue-and-groove sheathing over the joists, staggering the panels’ seams. Secure with screws or galvanized nails. Main WebsiteThe Home Depot
Wall Framing and Assembly
Building Wall Panels
Frame each wall on the ground using 2×4 lumber. Include openings for doors and windows. Once framed, raise each wall and temporarily brace it before securing. Summerhouse24 IrelandMain Website
Securing the Walls
Square each wall using a level or carpenter’s square. Secure with screws or nails, and remove temporary braces once the structure is stable. Main WebsiteSummerhouse24 Ireland
Roof Construction
Framing the Roof
Depending on design, build rafters using 2×4 or 2×6 lumber. Space rafters adequately, cut bird’s-mouth notches if needed, and attach securely to the wall frames. Main WebsiteSummerhouse24 Ireland
Roofing Materials
Cover rafters with plywood or OSB roof sheathing. Install roofing felt or underlayment followed by shingles or metal sheeting, ensuring full waterproofing. Main WebsiteSummerhouse24 Ireland
Exterior Assembly and Finishes
Cladding and Weatherproofing
Attach siding—such as tongue-and-groove or T1-11—to the framed structure from the bottom up. Install breathable membranes if needed. Summerhouse24 IrelandMain Website
Doors and Windows
Fit doors and windows into pre-framed openings. Add trim, seals, and weatherstripping to protect against drafts and moisture. Summerhouse24 Ireland
Final Touches and Maintenance
Finishing and Protection
Apply wood preservatives or sealants to all exposed surfaces. Consider adding interior cladding or insulation if you plan year-round use. Summerhouse24 IrelandLivingetc
Add Extras
For functionality and comfort, think about lighting, shelving, guttering, or even security measures. LivingetcGreen Harbor Tools
Common Mistakes to Avoid
Avoid pitfalls by learning from experts:
- Incorrect site selection: building on damp or uneven ground leads to instability. Livingetc
- Poor foundation preparation: results in structural issues over time. Livingetc
- Skipping weatherproofing: neglecting sealants or cladding leads to rot or leaks. Livingetc
Quick Reference: Step-by-Step At a Glance
- Plan and check for permits
- Clear and level the site
- Build a solid foundation
- Construct floor frame and sheathing
- Frame and raise walls
- Build and finish the roof
- Add siding, cladding, doors, and windows
- Apply finishing and weather protection
- Install extras and maintain regularly
Conclusion
Building a garden shed is an achievable and satisfying DIY project—whether you’re creating a workspace, tool storage, or a personalized retreat. By preparing your site carefully, building on a solid foundation, framing accurately, and finishing with durable materials and weather protection, you’ll create a long-lasting structure. Ready to take the next step toward your dream backyard shed? Gather your materials, sketch your plan, and let’s get building!